Je Mange


“I eat therefore I am”– Culinary Genius

Tuesday, October 31, 2006

Pound Cake: Elvis Style

We're baking a decadent desert tonight. It's in honour of my brothers immanent arrival scheduled for tomorrow evening. We'll try to save him some.

We've baked this pound cake once before. It was super rich, fluffy and tasted sweetly of eggs. That recipe called for 5 eggs, Elvis preferred his cake with 7; which is how we are preparing it this evening.

Pound cake got its beginning by consisting of a pound of eggs, a pound of butter, a pound of sugar and a pound of flour. This resulted in something quite dense and artery clogging. Though still apt to clog arteries the recipe we're following will produce something also quite light.

Ingredients:
1 cup unsalted butter
1 teaspoon salt

3 cups granulated sugar
1 teaspoon baking powder

5 large eggs (or 7 per Elvis)
2 teaspoons vanilla

3 cups all-purpose flour (Sift 3 times before measuring)
1 cup whipping cream


  • Butter and flour 2 9by5 inch loaf pans (or whatever else fits, just be sure to check it).
  • Whisk salt and baking powder into pre-sifted flour. Set aside.
  • Cream butter and sugar together in an electric mixer until light, fluffy and almost white, 4 to 5 minutes, stopping mixer once or twice to scrape down sides.
  • Add eggs one at a time slowly, beating well after each addition.
  • Add one third of flour mixture into the mixer set at low speed.
  • Add half the whipping cream. Mix.
  • Continue alternating flour and cream, ending with flour.
  • Add vanilla. With rubber spatula scrape down sides and bottom until completely mixed. Pour into loaf pans, up to 2/3 full.
  • Start in a cold oven. Place pans on middle rack of oven. Turn oven to 325 degrees. Bake for 1 hour and 20 minutes or until toothpick comes out clean. (Note: It only took ours about an hour, so check early)

Saturday, October 28, 2006

Is the Chef Dead?

Well it has been 4 days. My chef dosn't seem to be doing well. No bubbles, no yeasty beer smells, no foam; none of the signs of yeast.

It seems to be separating; a stinky watery substance on top, a goopy floury substance on bottom. From what I've read the watery stuff is known as hooch, though if I don't have a yeast colony then it ought not be hooch. Hooch is said to be harmless; it can be poured off or mixed in. I wonder if the smell I'm smelling is that of rancid water and flour?

Tonight I poured off the hooch since the whole thing is rather watery. I mixed in some more flour and water. I'm going to leave the cover half off.

If you build it they will come.

Tuesday, October 24, 2006

The Chef: Naturally Leavened Bread

Well I've gone and done it; I've started what I hope to be a long line of naturally leavened bread, leavened by wild Brooklyn yeast. Perhaps I will pass on this line of yeast to my children and to my children's children? It's rumoured that in China there are old very lineages, hundreds and hundreds of years; I'd sure like to taste one of those dumplings!

There's no telling if this first attempt will be successful. It may just mold or not ferment at all. Anyhow the idea is that there is yeast floating all about and that stirring up some water and flour will provide a nice habitat for said yeast. Hopefully in about 3-4 days I'll have tell tale signs of yeast life and proliferation; bubbles.

Make sure to use filtered or spring water; chlorine may inhibit yeast growth and give your breads an off taste. There are plenty of choices of flour; stone ground this, organic that. I used what was in my cupboard, unbleached white all purpose flour. You can also use fancy methods of introducing yeasts, like grapes or raisins. I'm looking for wild Brooklyn yeast so I did not attempt this.

In turn one must feed the colony (also known as starter, the bitch (as in "feed the bitch") or the chef). This is done by adding equal parts of water and flour. I've read that it should be fed every day, ramping up feeding towards the end (when bread will be made). If everything goes according to plan feeding should start around day 4.

Wednesday, October 11, 2006

Thanks Giving Au Canada

This post was long in comming. We lost the internet for nearly a week and I've been pretty busy with life recently.

Anyhow for our Canadian Thanksgiving I made a Thompsons Turkey; a madening affair consisting of more thank 20 ingredients. (I'll restrain myself from posting the monsterous recipe here, do an internet search and you can find it) Our sides included lumpy (but delicious) buttermilk mashed potatoes, stuffing and spiced brown sugar carrots.

I'll not give any recipe since none existed. However I'll tell you what I put into the carrots and 'tados.

Spiced Brown Sugar Carrots:
  • Cut in a consisten size
  • Bake in small amount of boiling water or roasted in oven (if oven, add a little water and oil)
  • When cooked add brown sugar, nutmeg and cinnamon, as desired
Mashed Potatoes:
  • Season boiling water well with salt
  • Mash while still warm
  • Use lots of unsalted butter
  • For liquid: butter milk, heavy cream and/or evaporated milk
  • Also try sour cream, cottage/riccota cheese, a finely grated strong tasting cheese
  • Don't use too much buttermilk, a little goes a long way

Wednesday, October 04, 2006

Mother's Apple Sauce

We had a tone of apples in our fridge; some left over from our Vermont trip in August, some which we've bought since. Perhaps we should be more judicious in our apple buying.

This is my mother's recipe which she made all through my childhood. We would buy bushels of apples every season from a place called Smithy's on the east side of Saint John. Afterwards she would can the apple sauce, among other fruits; notably pears (they figured hugely in my mind). We would keep the apples on our back porch. The whole place would smell of apples; fond memories. The apples would be cold and crisp, delicious in my opinion; I definetly prefer my fruit cold.

This is not so much of a recipe as a procedure. There are no measurements only a basic method and suggestions (I've added a few of my own).

  1. Wash, peel, fourth and core apples.
  2. Add some water (or I'd suggest some fruity liquid like pear juice) to prevent burning.
  3. Cook over medium low heat. As the apples soften break then up and stir.
  4. Season with sugar (or any sweetner of your choice; I'm curious about Chinese rock sugar). Note that you must do this by taste since apples will vary in sweetness every time.
  5. Season additionally with anything you fancy; perhaps lemon juice, ground cinnamon, ground nutmeg, ground cloves, raisins or nuts (or maybe wasabi, star anise, five spice powder, or ginger?)
  6. Consistency is a matter of preference or intended usage. Some like their apple sauce thick and chunky others like it smooth like the store bought.
  • To make it thinner add more liquid.
  • For chunky sauce don't break up the apples so much.
  • Thicker; cook it very low and reduce by evaporation.
  • Silky smooth, try running it through the blender.

Monday, October 02, 2006

Singapore Spiced Pork Ribs

I stole this recipe from "The Complete Asian Cookbook" (5th ed.) by Charmaine Solomon. I took a peek online and it seems there is a modern version of this book; mine is from '82, hard bound and has lots of retro photography. Frankly I'm curious and may have to buy the current version.

Anyhow this dish has become one of my old standbys; it really is delicious if you're open minded enough to eat pork with your hands. There are only a few areas in which I tweak the recipe. I sometimes use maltose for the honey. Rice maltose is traditionally used in glazing Peking Duck; many recipes in books that substitute the more esoteric Asian ingredients call for honey. Maltose is much cheaper and I like to think it is more authentic.

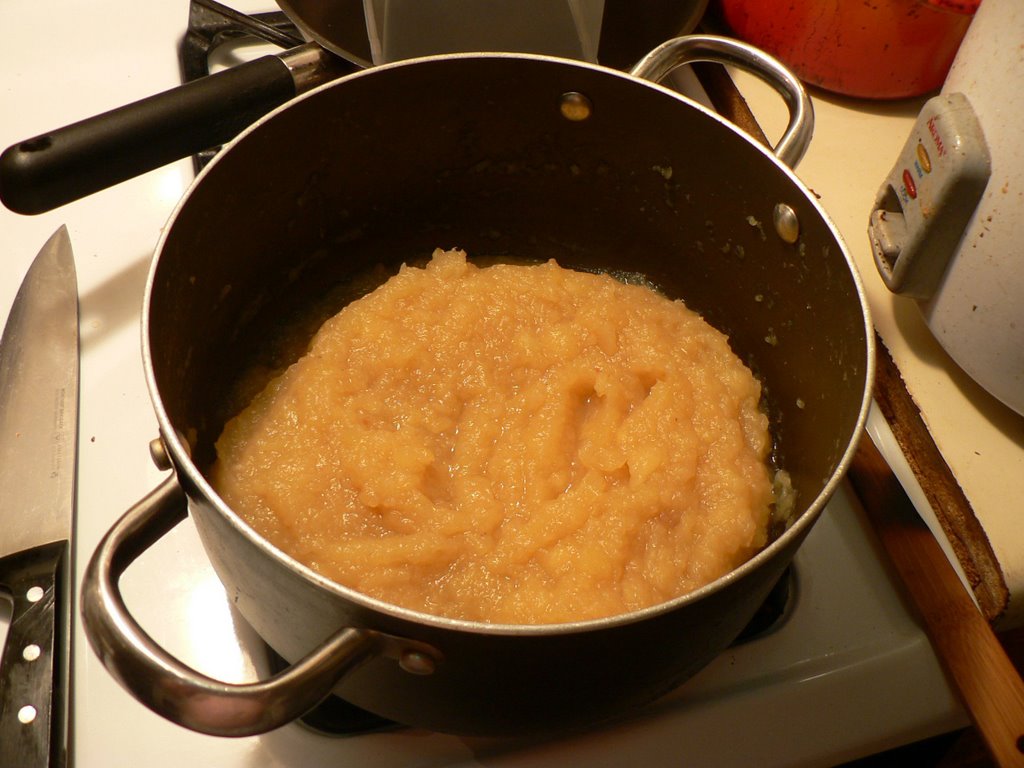
Another area which I tweak is cooking time. The recipe calls for an hour of cooking, I double that at a minimum. I simply find that the fat needs more time to render and become tender; essential for this type of dish.

I also like to substitute one tablespoon of dark soy sauce for light soy sauce. I find when trying to achieve deep, rich flavour and dark brown colour dark soy sauce helps tremendously. Let me also mention light soy sauce. I am not referring to low sodium soy sauce; never use this abomination. If you must cut back on your sodium intake then use it only to season food that has been cooked (eg white rice); under no circumstances should it be used for cooking. The 'light' refers to colour and flavour, contrasting from the 'dark' soy sauce (whose most common form is mushroom soy sauce). In general when Asian recipes call for soy sauce they refer to the light version.

You may have trouble finding small cut ribs. If you have a heavy cleaver (I use a 6$ stainless steel monster I picked up in Chinatown) and a good cutting board (I've split the thin ½ inch ploy boards) it's really easy to cut them yourself. If you're not shy you can ask the butcher to do it for you. They can run them through their band saws; very quick and a standard service. I prefer to cut them myself since a whole piece is cheaper (and its fun).

If you decide to cut them yourself (a process known as fabrication) simply cut the ribs top to bottom between the bones. Next cut each bone with a cleaver; you're looking for pieces about ¾ of an inch long. If you position the rib thin side up it will be easier to cut. Also if you don't go all the way through try turning it over and snapping it or another, lighter, hack will make quick work of it.

There are two methods of cooking these ribs; stove top or in the oven. I have always cooked them on the stove until today. I finally bought a roasting pan after a terrible experience browning lamb bones and mirepoix on jelly roll pans. I must say that I've been more than happy with the stove top results. However I now prefer the oven method; it is much easier since the stovetop method usually occupies two burners. In the oven I easily had enough room, even for a double batch.

Ingredients:
3 lbs Pork Ribs
4 Garlic Cloves
1½ t Salt
½ t Black Pepper
½ t Five Spice Powder
1 T Maltose
1 T Roasted Sesame Oil
2 T Light Soy Sauce
1 T Dark Soy Sauce
½ C hot water or stock

  1. Crush and coarsely chop the garlic on top of the salt.
  2. Add all ingredients except for the stock into a bowl or roasting pan; mix well. I often let then marinate for as much as 30 minutes to over night although results are still delicious without.
  3. Cook in oven in roughly a single layer at 350°F for 30 minutes.
  4. Add the stock and mix. Cook for another 1:30 hours or until brown and tender. Mix occasionally, say about every 20 minutes.

If cooking on the stove top:
  1. Follow steps 1 & 2 as above.
  2. Brown the ribs in a heavy large pan over medium high heat.
  3. Add stock and bring to a simmer. Reduce heat and cook, half covered.
  4. Stir well every 20 minutes or so until ribs are deeply coloured and very tender; about 1:30 hours. If ribs run dry of liquid (other than fat) add some stock or water otherwise they will burn.
I would further recommend utulizing the sauce; especially if the ribs are being eaten later or another day. Usually we can't keep our hands out of them once they are finished.
  1. Remove the ribs from the pan.
  2. Deglaze the pan with stock.
  3. Strain the resulting sauce into a tallish container.
  4. Let stand or store in the fridge; then degrease.
  5. Serve the ribs reheated with the sauce.

Sunday, October 01, 2006

Beef Noodles

This is the girlfriend's plate of noodles; half a pound of food. My beef noodles have sort of evolved over time. I guess it could be called beef lo mein however the way I cook it every bite should be full of beefy flavour. The beef has been cut the same width as the noodles; the noodles themselves are firm and bouncy, covered in delicious sauce. I find that adding other ingredients (such as scallions, egg, leafy greens, ginger, peppers etc) detracts from the dish, which is beefy goodness. Hence the dish's name (Beef Noodles) instead of beef lo mein.

I prefer to use the thicker, fresh egg noodles than Italien pasta or thinner Asian noodles. The size is just right to be mimiced by beef; both from a cutting point of view and their firmness. I also favour them over the rice flour noodles which are greyish white; I prefer the flavour of the egg noodles.

Ingredients:
~5 oz lean beef
~1 T soy sauce
1 t & 1 T fish sauce
1 T & 3 T oyster sauce
2 t cornstarch
1 lbs egg noodles, fresh (can be frozen)
vegetable oil
  1. Cut beef into thin strips about 2-3 mm in width & height and about as long as your index finger. Combine with soy sauce, 1 t fish sauce, 1 T oyster sauce and cornstarch in a bowl and marinate for atleast 30 minutes, preferably about 2 hours.
  2. Put noodles in a pot, covered with cold water. Place over high heat and bring to a boil. Remove and strain; run under cold water to stop the cooking process. Sprinkle with about 1 T of oil; toss briefly and set aside.
  3. Bring beef to room temperature. Heat a larger skillet over high heat. Add about 2 T oil, allow oil to heat, then add beef. Turn beef constantly until most of the meat is seared, about 2 minutes. Do not overcook. Set aside.
  4. In the same skillet add the noodles, set heat to medium-ish. Toss so that they are evenly heated. Once the pan approaches dry (a few minutes) add the 1 T of fish sauce.
  5. Continue to toss another 2 minutes then add the oyster sauce and continue to toss until it is evenly distributed.
  6. Add the beef and toss again until evenly distributed. If there is sauce still in the bottom of the pan, continue tossing until it is almost dry.
  7. Serve hot.

Free Squash

I got home late yesterday after doing some shopping at the local department store for varmint control devices. No sooner had I closed my door there came a knock, I had been followed up to my second story appartment. Lo and behold a smiling landlady, in her outstreched hands an offering of squash. We thanked her with many slight nods of the head, also smiling. I guess this means she wants more soup?