Je Mange


“I eat therefore I am”– Culinary Genius

Friday, December 04, 2009

Fried Rice: Dumplings, Fried Egg, Sausage


Simple fried rice: refrigerated dry white rice, soy sauce, salt, white pepper, scrambled eggs, scallions
Sauteed sausage: thai sweet sausage started in a little water and slightly carmalized
Fried egg: cooked hard, salt and pepper
dumplings: store bought, oil, water, frozen dumplings, covered, browned, sauced in black vinegar, sriracha, sugar, kecap manis and finished with sesame oil

Gratin

I love the gratin.

I havn't made then for a long time. I generally like to keep it simple. Maybe garlic, onions, herbs, cheese.

A gratin is very simple to make. The hardest part is cutting the potatoes the same thickness and having enough time to let it cook properly. With a little planing its very simple.

I used a med sized dutch oven, 8 med russets, ~2 cups of cream & half 'n half and 1 stick of butter. Seasoned with salt, white pepper and some of the nastiest bottled parm in existence. You'd probably do well to cut back on the butter, to say 1/2 a stick or 1/4 C

Peel and slice the potatoes about the thickness of a silver dollar or a toonnie. I used a japanese mandolin, very easy and useful. theyre used all over in restaurants and cost just 25$.
Dry off your potatoes if desired (i just shook them off in a collander) and make layers in your dish. season with decent amounts of salt and a little white pepper, place dabs of butter, layer again and so on.
I then poured in the dairy until i could barely see it. Then I pushed down on the whole thing, pressing out air and compacting it; a very important step.
On top I put the cheese though itd have been fine without it. Traditionally cheese is not used, the 'cheesy' flavour is achieved by the Maillard effect on the dairy.
I baked at 350 for about 1.5 hours. I put it on a jelly roll pan in case it spilled over. My dish was fairly deep so it wasn't really needed. There should be no more liquid except butter and the potatoes should be tender and giving yet not falling apart or turning into mush.

Saturday, November 14, 2009

Soup yet again


Soup again....

Sauteed onions, garlic, greens
steemed lop cheung, dried shrimp and black mushroom
heat broth (chicken stock, water and broth powder)
cooked some ramen
added everything else
topped with some left over braised pork
a fried egg
and a splash of sesame oil
deep fried indonesian shrimp chips on the side

Tuesday, November 10, 2009

Chicken Soup

I'm starting a cold so I wanted something warm and nourishing.

4 cloves garlic, sliced
1 big shallot diced
sauteed in chicken fat
chicken stock/water
dehydrated shrimp
dehydrated black mushrooms
lop cheung
chunks of poached chicken
generic ramen
some of the seasoning mix from the ramen
chiffonade of chinese greens (dark and leafy)
dumplings on the side
sliced poached chicken on the side, sauced in indonesian katchup manis
splash of sesame oil on top of soup


i was missing some scallions.


Saturday, September 26, 2009

Yes I'm still eating; we're still eating but little documentation.

Recently I sauteed pork chops, braised pork shoulder and tossed our new favourite eggo noodles.

The pork chops came out fantastic. I just used salt (a lot of it, enough that you'd think you're over salting it) and fresh black pepper. Season both sides and let it sit for 30 min or more depending on thickness. I dusted some with flour, you could also pat them dry but even the ones I didn't dust came out golden brown. I used a good amount of oil heated up quite high but not so high that the pan/chop burned before it was cooked. Don't over crowd the pan. These chops are delicious when done right, that is seasoned well and browned well. They're great with the aggressively flavoured noodles, sliced over top.

For the braised pork shoulder I cut a large piece into smaller pieces; a little smaller than 2 golf balls together. I used a Singapore braise recipe I've often used for ribs in the past. After braising until super tender I removed the meat and reduced the liquid, letting the meat sit in the liquid over night helps tremendously, and then you can easily degrease it too.

I've been buying a dry egg noodle with shrimp in it. they are thin yellow and delicious. I've just been cooking them al dente and then tossing with canola, oystersauce, a little fish sauce, sriracha and toasted sesame oil at the end. Sauteed and fresh veggies often go on top or the side but lately I leave them separately so everyone can take as much as they want.

Thursday, February 05, 2009

basil chicken a la lazy

My sister kuna and tony made their basil chicken from a thai cookbook. I've made it a few times because shayo really likes it, and i like it too.
so i bought everything for it but im sick and tired and i didnt want to follow a recipe. i had to wash dishes and cook and eat. it was already 7pm.
so I just improvised.

3 chicken breasts, broad thin slices
3 bell peppers, med dice
1 largish onion, med dice
4 clove garlic, sliced thing
basil, small handfull

marinade:
<1 T tomato paste
3 T terriyaki sauce (something I found in my fridge and i want to use up) or sub soy and sugar
1 T sriracha sauce
1 T salt (that terriyaki wasnt salty!)
1 T dark soy
1 t sesame oil
1 T cornstarch
1 T oyster sauce (they really arent made equally. we like the red panda bottle)

sauce:
1/2 - 1 C water or stock
1.5t cornstarch dissolved in 2 T cold liquid: just guestimate
tomato paste: as needed
terriyaki sauce: as needed
sriracha: as needed
salt: as needed

garnish:
very thin chiffonade
~1 T sesame oil

1. marinate meat for about 30 min left out
2. stir fry over very high heat the bell and onion, after they have charred a bit and softened up add the garlic and turn heat down a bit. cook for another couple min. remove
3. stir fry the meat in batches if need be, let the meat first sit in a single layer and develop some browning, then stir and fold until there's no more raw meat visible. add the veg and
4. add the liquid for the sauce, stir and cook it, adjust seasonings, thicken with as much of the cornstarch mixture as needed. imagine tangy bite of the sriracha, a hint of sweetness balanced by the tomato with undertones of earthy mushroom soy.
5. stir in some basil. adjust seasoning again.
6. garnish each dish with some basil and sesame oil on top and serve immediately.

other thoughts: red and yellow bells work nicely with the green basil. this dish should be very aromatic with the basil and sesame oil.

Thursday, January 29, 2009

Herbed Milk Chicken

So this is something I created today. It's Chinese New Year so I've mostly been cooking and eating Chinese food but tonight I wanted something different. 

I had a bunch of skinned chicken thighs cut in half and low on aromatics, 1 onion, shallots and garlic. 

The idea of butter chicken came to mind (I have a ready jar of ghee in my cuboard) a tasty Indian dish but I had no clue of its ingredients and was too lazy to check. From butter my mind went to Italien spices of which I have ample dried. This dish developed itself, it is rich, creamy, balanced and aproaching etheral.

This could be a soup, sauce or a saucy dish over rice, potatoes, pasta or some other light grain. I think I'll cook up some orzo.

Don't be too concerned about over salting. Since chicken is fast cooking its very important to season it well enough and usually in advance (esp if its thick). My sauce was too salty initially but the milk took care of it. It's an interesting practise to make something no longer salty as opposed to coming at it from the other end (many people are afraid of putting too much salt in and would be agasht at the amount of salt used in restaurants). Whenever you cook a food in a large amount of liquid it should be slightly over seasoned in order to get enough salt into the protein. If the liquid is under seasoned it will just leach salt from the protein.

  1. 5 shallots, sliced
  2. 1/2 head of garlic, sliced
  3. 1.5 quarts of chicken, seasoned
  4. 2 T butter: clarified, whole or ghee
  5. 2 t thym
  6. 1.5 t rosemary
  7. 1.5-2T summer savory
  8. 2 t black pepper
  9. 1+ t light vinegar (I used some high quality sushi rice vinegar, which is lower acid)
  10. plenty of salt
  11. ~1c water or stock
  12. 1t thai sriracha sauce
  13. ~1 c milk; heavy and delicious (we have a fine organic milk from Archer farms)
  14. 1-3 T roux

  • Sweat the garlic and shallots in the butter, season with salt
  • put the chicken in, turn it and let it get white all over.
  • add thyme, rosemary, savory and pepper, turn.
  • add stock/liquid and vinegar.
  • bring up to a boil. lower heat for a simmer, covered.
  • dont over cook! cook for about 8 minutes, checking the largest piece.
  • remove the chicken, blend the liquid (I used an immersion blender)
  • pass the liquid through a fine mesh
  • put the liquid back on the heat, add the hot sauce and milk. dont put too much milk or too little, adjust as desired.
  • adjust the acidity, it should be rich but not cloyingly so. 
  • adjust seasoning. 
  • mix in roux to desired thickness
  • have loved ones taste it and be impressed.

Other thoughts:

  1. further processing of the meat in order to get more herb flavor inside, perhaps marination if its not thick, an herb brining or a paste. 
  2. garnish with fresh herbs. use something that's in the dish, not parsley. 
  3. I think marjoram would be delicious too. 

Tuesday, January 27, 2009

Chipotle Chicken

3 large onions (substituting shallots for some or all if you have them)- med dice
1/2 head garlic, sliced
1.5 T paprika
3 T tomato paste (and some diced sun dried tomatoes if you have some)
5 chipotle, seeded, cut in half or chopped fine if you want to eat them
2 green thai chili if you have them, seeded and chopped fine
dry sherry, chinese cooking wine or light wine to deglaze, about 1/2 cup
stock, about 1.5 cup (you can also use tomato water)
1/4 cup ketchap manis (thick, dark sweet indonesian soy sauce) or 2 T sugar with dark (double black or mushroom) soy equaling 1/4 cup
protein equaling about 12 largish drum sticks; well seasoned with salt beforehand. you should not salt it more than an hour before cooking it. if using tofu make sure to salt it well!

1. sautee onions in olive oil or appropriate fat until translucent (season with salt), add the garlic (season with salt) and cook until onions are brownish and you have a slight fond. dont burn it.

2. add tomato paste, paprika and chiles. cook for another several minutes adjusting heat to avoid burning. season with some more salt.

3. deglaze with alcohol making sure to clean the bottom of the pan.

4. add the other ingredients except the  protein. depending on the length of cooking time for your protein you should let the sauce cook and meld, adjusting salt as needed. tofu and fish take little time to cook. you can brown your protein but with the dark soy and tomato paste i usually don't.

5. once your sauce is brought up to a near boil taste and reseason. you can then add whatever it is you're adding. i like using drumsticks or pork shoulder.  comercial meats and some varieties of tofu let off a lot of water others don't so you may need to add more stock, you can always reduce the sauce by itself at the end.

6. you can braise or just briefly cook food in this sauce. tender beef, tofu and seafood would be very short. Chicken has to be cooked through but is still pretty fast. Tough meat requires true braising and could take many hours. 

7. once cooked you may do several things. you can strain the sauce, blend it, blend and strain or leave as is. if youve left seeds in your peppers you may very well want to strain it. You can also saute veggies and toss in the sauce and cook briefly to let it meld. make sure to adjust seasoning, veggies give off lots of water. I like to saute onions, bell pepper and sliced garlic and toss it. 

8. with any real braise the food is usually best the next day while spending the night emersed in its sauce. degreasing is often useful, when i deskin/fat chicken before cooking i dont bother. otherwise and easy method is to put the meat in the container large enough for everything. put the sauce in another contain with a narrow mouth and let it sit, seperate and congeel in the fridge for an hour or two. defat it, let the sauce come to room temp or heat it and pour it over the meat. deep fried, frozen and pressed tofu would probably benefit greatly from letting it sit over night.

9. as veg i think thinly sliced celery, sliced galic and med-small diced vidalia would be delicious.

Saturday, February 16, 2008

Sauerkraut

Sauerkraut is known as choucroute in France, also spelled sourkraut or simply referred to as kraut. It's an integral part in the reuben sandwich. It can be bought in bags or cans from grocery stores. It is very popular in France and the Germany area. There it is normally eaten as a plate with fatty items like sausages and such charcuterie items.

Sauerkraut is very easily made, all you need is salt, water, green cabbage, an opaque container, 70 °F and about two weeks. The procedure is simple: bring to a boil 4 L of water and 200 g of salt, cool, put thinly sliced cabbage in your container, cover with salt water, weight down the cabbage (possibly wrapping the top with cheese cloth) with a plate, put the cover on, put it in a cool corner and mark your calender. Two weeks later its all set; to eat, braise it in its brine water and some clean water adjusting for acidity.

Thursday, January 17, 2008

Grinder

Recently I bought a vintage all metal grinder attachment for my kitchenaid standing mixer.
Why would I buy an old part? The current food grinder offered by kitchenaid has a plastic housing which tends to crack. I will mainly use this to grind meats to make forcemeats; which are used in sausage, terrine, paté and such.

Thus far I have made basil-tomato chicken sausage and garlic porc sausage; they are delicious.
I will spare technical detail for another time. Suffice it to say that I marinated, ground, taste tested, stuffed and cooked & froze 8 lbs of sausage.

Here is a poor picture of my grinder. I also have a fine grinding plate which is essential for my purposes.

Sunday, September 23, 2007

Mexican Feast

So we're planning to do some Latino cookin' for a while. Lately we've eaten at a delicious Ecuadorian joint in my old hood of Astoria. Also at a place in our current neighborhood a country style Mexican place.

Today I cooked refried beans, a chipotle-tomato braised chicken and pork dish and yellow rice. There is no recipe per say for any of these, just flavours, intuition and some care. A note about chipotle peppers; I used a caned version. These peppers are smoked jalapeños and canned with some delicious sauce. I cant remember the brand I use but there's a picture of a black haired Hispanic woman on the front with an orange background.

I used black beans but they say you can use pinto as well. Soak them over night. Sauté onions and garlic; add cumin, hot pepper powder, oregano, thyme and S&P. Cook out for a little then add the beans with enough water to cover about an inch. Bring to a boil and turn down to medium. Let it cook until tender adding water as needed. Once cooked blend about 2/3 of the beans until smooth and pasty; add the rest of the beans and mix in. Sauté some more onion, season as desired with anything from above and cook the beans until rather tight and pasty. You can do this in portions or by adding some a cup at a time. Taste and season.

For the rice I followed a basic pilaf formula. I used turmeric, S&P, onions, garlic, cumin, chicken stock and chopped tomato. It was a little under seasoned when cooked but you can always adjust it afterwards. It

The chicken-pork dish was just a simple braise. In the braising pot I sautéed onions, canned chipotle peppers with the sauce, garlic, red bell peppers and carrots. I seasoned it with cumin, allspice, thyme, bay leaves and of course salt and pepper. For liquid I used some chicken stock, a bit of corona I was drinking, some Pinot Noir and tomato puré. I then seasoned the meat with salt and pepper, dusted with flour and browned it in batches. Put everything in the pot, bring to a boil and simmer, covered, until done. You'll have to remove the chicken first since it will finish cooking before the pork, generally. Afterwards I removed the meat and discarded the bay leaves and blended the sauce to make to make it thick and rich (also so that my girlfriend who has trouble with veggies will get her vitamins). If need be reduce the sauce further to proper consistency.

I served it with sour cream and a small salad of shredded red leaf with cubed tomato.

Sunday, September 09, 2007

Shrimp & Scallops and Chips

My Partner Unit requested deep fried food for her birthday. This is a toss back to our vacations to Canada during which we'd chow down at roadside-seaside seafood shacks on the East Coast.

For this I used a beer batter that I learned in cooking school. I made scallops, shrimp and onion rings. You can either season the food items with salt and white pepper or season the dusting flour; if you season the flour make sure to over season it.

For the shrimp I removed all shell, tail, legs and intestinal track; it runs through the length of the body on the top side. Sea scallops sometimes come with a little hard piece of connective tissue on the outer side which is peel off. Dry the seafood well on a towel and season if desired.

Slice onions thinly, about 5mm; I only used the larger rings and saved the smaller center rings for other uses. For French Fries use russets; cut them fry shape however thick you like but make sure they're consistent. Soak the cut fries for 30 minutes in cold water. Par-cook them at around 250°F for 6 minutes without browning; if they start browning take them out immediately. Let then cool completely before cooking the final time; this step allows starches to come to the surface and will help give a crispy exterior.

I actually par-cooked the battered food aswell, until the batter was just set and ideally before developing the golden hue. I did this so I could toss it all back right before we were ready to eat, so that every thing's hot and crispy when sitting down.

Ingredients:
5 oz Flour
1t Baking Powder
1t Salt
1t White Pepper
½ Egg
1 C Beer, very cold
Flour for dusting

  1. Heat oil to 350°F-375°F
  2. Sift your dry ingredients.
  3. Set up a plate or bowl with flour for dusting.
  4. Set up a cooling rack over a jellyroll pan or some device to place the fried food.
  5. Make sure you have tongs and/or a spider to manage the food in the oil.
  6. Beat Egg and mix with beer. Add dry ingredients, mixing until just combined; there should be some small lumps. Set the bowl in an ice water bath.
  7. Arrange your items in a logical, easy to maneuver, fashion (food->dusting->batter->fry oil->cooling rack).
  8. Work in small batches, whatever you're comfortable with.
  9. Cool or hold in the oven until ready to finish cooking; or just cook all the way until nice and brown.
  10. Once finished cooking season immediately with salt.

Saturday, July 14, 2007

Chicken Pork Adobo

This is a recipe from Molly Stevens' "All About Braising"; which has proved to be excellent on several occasions. This is a Filipino version mind you, other ethnicities use the term 'adobo'. In fact Molly uses the term 'adobado' but I think it's the same thing, when in the Philippines we used the term adobo, as well, all Filipinos I've known use the later.

Anyhow, I know for sure this dish is tasty.

Chicken and/or pork are most popular but any other type of meat may be used. Leave the skin on the chicken. The pork should be appropriate for a shorter braise, you don't want the chicken to fall totally to pieces waiting for the port to cook tender. If need be you can remove the chicken until the pork is ready.

6 cloves garlic, sliced
½ C white wine vinigar
½ C water or savoury liquid
2 T soy sauce
2 t lime zest or some type of citrus
2 bay leaves, torn in half
2 t brown sugar
½ t salt
½ cracked black pepper
3.5-4 lbs of meat

  1. Put everything in a ziplock bag or a dish and let marinate for up to 2 hours. Don't go much longer otherwise the vinegar will ruin the texture of the meat.
  2. Put it all in a pot and bring it up to a boil, turning down to a bare simmer, covered.
  3. Cook until done! Until the meat is pull apart for tender. Maybe about an hour?
  4. Remove all the meat. Brown in batches in a skillet or under the broiler (my new, preferred method).
  5. Strain the remaining liquid. Put back over heat and reduce until it thickens. Taste for salt and pepper.
  6. Eat.

Tuesday, July 03, 2007

Ice Cream: Coconut

I recently bought a used Donvier icecream maker. It is a handcrank churner utilizing a frozen bowl.

My first attempt turned out wonderfully.

I made a 40% fat custard infused with freshly grated coconut. Adjust the cream and milk according to your desired fat ratio(keep in mind most decent commercial ice cream has a fat content of >18%) Churning the next day proved effortless: it only took ~25 minutes of intermittent cranking.


Crème anglaise a la coconut:

6 Yolks
Sugar 6 oz

Heavy Cream 3 C
Meat of 1 Coconut, grated

vanilla ½ t
salt, pinch

  1. Scald dairy and coconut. Let stand for 20+ minutes.
  2. Bring back to a scald. Wisk yolks and sugar.
  3. Strain dairy. Temper dairy into the yolks, be careful not to make a froth from too much agitation.
  4. Return to heat over med-low, stirring constantly.
  5. Cook until done! It should be thickened slightly, coating the back of a spoon, the consistency just more than heavy cream.
  6. Chill in an ice bath to halt further cooking.
  7. Churn per your ice cream machines directions.

Thursday, June 21, 2007

The Golden Kiwi


On one of our fruit buying excursions in china town we found these. Lighter in colour than the more common kiwi.

The flavour is different and not unappealing. I'd describe it as smoother and subtle.

I'm not sure if these are to be found notoriously unripe as are the others.

I think they might look nice as garnish, intermingled with the darker, greener kiwi, say on a fruit tart.

Tuesday, June 12, 2007

Pastry Cream, Part Deux

Pastry cream is versatile in its ability to assume different flavours. It lends itself to infusion of its liquid (such as cinnamon, vanilla beans & tea to suggest a few). These items could be strained out or left in; the vanilla bean's husk is removed but the seeds remain.

After the cream has been cooked you may also add distinguishing ingredients. Liqueur and extracts are clear choices but more substantial ingredients might also be added: chopped candied citrus peal, roasted coconut, nuts.

Sunday, June 10, 2007

Pastry Cream

Pastry cream is a rich, versatile, easy and quick custard used as fillings in cakes, tarts, éclairs, pies and other pastries. It can be flavoured in any fashion.

Ingredients:
Milk 16 oz
Sugar 2 oz

Egg Yolks 5
Cornstarch 1.25 oz
Sugar 2 oz

Vanilla ½ t
Butter 1 oz

  1. Scald the milk and sugar.
  2. Whisk the yolks and sugar, then add the cornstarch and whisk.
  3. Temper the milk into the yolk mixture.
  4. Return to pot and cook over medium heat, stirring constantly.
  5. Cook until thickened and brought up to a boil. To test, stop mixing for a few seconds, the custard should 'blurp'.
  6. Remove from heat and whisk in butter and vanilla. Continue whisking until smooth.
  7. Bladder wrap in saran wrap or a container with some saran wrap placed on top. It is important to protect the cream from air otherwise a skin will form.
  8. Chill until ready for use.

Tuesday, May 22, 2007

Cream Cheesecake

A light recipe (in nature not calories) which my even my girlfriend enjoys. I've scaled it down 80% of the original which yields over 18 pounds.

Cooking time will vary depending on taste and pan. I cooked mine in ramekins and a small loaf pan, naturally the latter took considerably more time. Just try the toothpick test; it should remove clean, for the most part.

I've never cooked a cheese cake before but this recipe calls for a brief stint on high then long, low temperature cooking. There should be little to no rising, souffléing or browning.

The crumb is up to you. I'd suggest a crumb crust of graham crackers, stale cookies, corn flakes, stale cake or teddy grahams. I put teddy grahams in a small food chopper to break them down to crumbs. Then I added a pinch of salt and just enough melted butter to bring it together. Put the crumb on the bottom and/or sides. I'd suggest only the bottom if making it in ramekins.

Take out the cream cheese a few hours ahead of time to let it soften slightly.

A note on the recipe/formula format, the lines separate ingredients found in different vessels. For instance in this recipe we would use 3 bowls.

Without further ado;

Cream Cheese 2 lbs
Sugar 11.2 oz
Cornstarch 1 T
Lemon Zest, dash
Vanilla Extract 1 t
Salt 1 t
▬▬▬▬▬▬▬▬▬▬▬▬
Whole Eggs 6.4 oz
Egg Yolks 2.4 oz
▬▬▬▬▬▬▬▬▬▬▬▬
Heavy Cream 3.2 oz
Milk 1.6 oz
Lemon Juice, a squeeze
  1. Prepare the baking dish with crust (or not).
  2. Mix the cream cheese until smooth and pliable. Mix in the sugar, cornstarch, zest, vanilla and salt.
  3. Beat the eggs together and add a little at a time making sure to fully incorporate before adding more.
  4. Add the liquids slowly while mixing.
  5. Cook at 400°F for 10 minutes, afterwards turning down to 225°F. Cook for another 30-40 minutes before checking, then check every 10-15 minutes.

Wednesday, May 16, 2007

Veal Fricassee

Fricassee is a white stew or braise, often seen with chicken but it can be made with any white meat. It is really delicious and a great way to use tough meats.

I bought some cheap veal breast, cutting the meat into chunks and using the bones to make stock. I used the stock in the sauce and to make a tasty rice pilaf.

The bouquet garni used here is comprised of carrot, leek, thyme and bayleaf. Just use several slices of carrot, 1 sprig of thyme, some green of a leek or onion skin and 1 bayleaf.

Fatty Veal Meat 1½ lb
Salt & White Pepper TT
Whole Butter 1½ oz
Onions, small dice 1½ oz
Garlic, chopped ½ t
Flour 2 T
White Wine 2 T
White Stock 2½ C
Bouquet Garni
Heavy Cream, scalded ½ C

  1. Liberally season veal in salt and pepper.
  2. Cook meat in butter without browning for 2 min, stirring.
  3. Add onions and garlic, cook for another 2 min, without browning.
  4. Add the flour and stir well to make a blond roux, cook for another 3-4 min.
  5. Add wine and stock, mixing well.
  6. Add bouquet garni.
  7. Bring to a boil.
  8. Taste and adjust seasonings.
  9. Reduce heat to a bare simmer cover partially.
  10. Cook about 30 min until tender.
  11. Remove and reserve veal.
  12. Strain liquid, discarding onions and any lumps.
  13. Return sauce to pan.
  14. Add scalded cream, mix until fully combined.
  15. Taste and adjust seasonings.
  16. Return veal to pan and serve.

Tuesday, February 06, 2007

Broiled Thai Curry Shrimp

Ingredients:

8 shrimp (about 25-30 count) with heads and shells intact
1 T Thai red curry paste

  • Marinate shrimp with curry paste in a bag for 30-60 minutes. Dilute paste with some water if necessary.
  • Cover broiler pan with foil and preheat for atleast 15 minutes.
  • When read to cook remove shrimp and pat dry.
  • Cook in a single layer for about 20 seconds. If using smaller shrimp reduce this time, it should cook about ⅓ of the way.
  • Using tongs flip shrimp and cook for another 20 seconds.
  • Remove immediately lest they become over cooked. They should be slightly under done to account for carry over heat/cooking.
  • Serve immediately. Try serving with Thai sweet chili sauce.

Seafood Dinner

So my girlfriend has been very health conscious lately. By request I made lots of seafood for her. We went to a windy Chinatown and bought: 2 lbs of shrimp (with heads and shells intact), ½ lbs bay scallops and 2 salmon tails.

I ended up making:
  1. Broiled Thai Curry Shrimp
  2. Sautéed Salmon Fillet in Teriyaki Broth
  3. Sautéed Shrimp and Scallops with a Crustacean Butter Cream Sauce
  4. Kombu Dashi Rice Pilaf
I also served very cold and very good sake. Unfortunately the sake was ill received. Also the scallops were of poor quality upon tasting, in my opinion.

Monday, February 05, 2007

Thai Curry Paste


Well I had some success. After three hours of intermittent pounding I developed approximately 2 cups of brown sludge. It is terrifically flavourful and very hot.

Certainly I'm not pleased with spending so much time and watching so many crappy movies. However I feel that I've learned a thing or two about using a mortar and pestal; I think next time it will take me much less time.

I also think it's helpful to prep the ingredients as best as possible. For instance the recipe calls for chopped items, I could process them in a small food processor. (Why not do the whole thing in a food processor you ask? Well there's lots of oils and flavours that develop through pounding; such as the seeds of the chilies all have to be crushed.)

The ingredients, going clockwise, starting left of the yellow can, at the 6:10 position.
  1. chopped garlic
  2. chopped cilantro roots and stems
  3. chopped reconstituted dried chilies, half seeded
  4. chopped roasted fresh chilies
  5. ground roasted coriander seed and Thai white peppercorns
  6. ground roasted cumin and caraway
  7. freshly grated nutmeg
  8. chopped lemongrass
  9. rind/zest of kaffir lime
  10. chopped shallots
  11. shrimp paste
And there is salt in the mortar. First you begin with the garlic and form a paste, adding each successive ingredient only when the current is well incorporated.

Saturday, February 03, 2007

Thai Showdown

So it all began with some friendly competition of gift giving between Shayo and I at Christmas. A food book she had given me, which proved to be exceptional, lead me to 'Cracking the Coconut' by Su-Mei Yu. (Incidentally the book I was given was Steingarten's 'It must have been something I ate'. She trumped me in books but I won overall. Varily I gave her no books since she's not read any books I gave her from the Christmas prior.)

Yu's book takes a traditional approach to Thai cooking. Last week I found a huge mortar and pestal in Chinatown and schlepped the 40 lb weight back home. According to Yu the cornerstone of Thai foods flavour is composed of in a base paste consisting of salt, garlic, Thai peppercorns and the stems and roots of cilantro. Thankfully we buy a full case of cilantro at work every week, dirty roots included. Normally we curse and toss them out but I snagged and cleaned some for my experiments.

I've done my research. I've consulted my Thai grocer. I've bought the necessary(and the unnecessary) ingredients and corresponding gadgets (actually I still lack a full sized food processor). I even have a fresh coconut and a backup of frozen shredded coconut defrosting in the fridge. I felt this precaution prudent since fresh coconuts are notorious for not being fresh (the water inside is rancid, the flesh is brown, bugs infest the skin, its molding etc).

So with the final purchase of some whole nutmeg I feel confident in tomorrows Thai showdown where the true curry is distinguished from the posers. I'm not actually battling anyone but my chef and Thai grocer want to have a taste. I personally hope to create something better than the ubiquitous Thai pastes found in those colourful cans, tastes so commonly found in the scores of those charming Thai restaurants which abound in New York City.

Monday, January 15, 2007

Risotto

Well it seems that I was a bit overconfident in my last post; I havn't been cooking at all. Sure there's been plenty to write about but I can't seem to muster the energy to post photos.

Last week my school break ended and in my second class I learned to make basic risotto.

Risotto is often made with a short grain rice from Italy called Arborio. After sautéing onions in your choice of fat the rice is added and brown slightly. Warm flavourful liquid is added; thus you should have an additional pot on the heat to keep the liquid warm. Maintain a simmer and continue to stir the rice. Once the liquid has nearly all gone add more and continue to stir. At this point you might add different ingredients and flavourings. Cooking the rice slowly and maintaining the heat will coax the starch from the rice. Risotto is served al denté, thus other foods must be timed to finish with it and not vice versa. Risotto is also a very slack dish; there's lots of liquid, its creamy almost like rice porridge.

For traditional risotto, the sort I made in class, parmesan cheese and butter are added at the end; make sure to do this off the heat since the sauce may break due to the quick addition of a large amount of fat. Make sure to add salt and pepper to taste. The ratio of liquid to rice is something like 5 to 1 but this really depends on the evaporation. Two factors influence evaporation: area of cooking vassal and heat; be mindful, you can not rush risotto.

Sunday, December 03, 2006

Cooking Again: Garlic Apple Roast Chicken

After two colds and a virus I'm feeling better again. Besides being sick I have also been rather busy. In the past weeks I've been entrusted with keys to the restaurant; I now open on Fridays. I've written the test for the New York Foodhandlers certificate, which I aced. I volunteered for my former chef instructor, helping to give people a class themed on Thanksgiving sides. For American Thanksgiving I co-cooked a meal with my brother (whom is staying with us til he gets on his feat). And tonight I'm making roast chicken and mashed potatoes.

I've brined a 6 lbs chicken for 5+ hours. I made a sweet garlic brine and stuffed the chicken with a few apples.

Ingredients for 1½ gallons of brine:

1 qt hot water
1¼ gallons cold water/ice
5 bay leaves
1½ C salt
½ C sugar
¼ C honey
½ T pepper corns
½ T thyme
2 T lemmon juice

  1. Combine all ingredients except the cold water. Bring to a boil, simmer for 5 min.
  2. Add cold water/ice.
  3. Once brine is cold submerg in it the chicken under refridgeration.
  4. Brine the chicken for 4-6 hours.
  5. Remove the chicken and discard the brine. Roast the chicken or reserve for later use.

Note:
  • Reduce the salt by half if you wish to double the brining time.
  • Use any water soluble aromatics and seasonings in your brine.
  • Double the recipe as needed.

Friday, November 10, 2006

Kabocha-San!

Here's a nice picture of a delicious fruit; the kabocha squash. My first encounter with this little fella was at work. We've been serving this squash diced, steamed with skin on; salt, pepper and a little olive oil to round out the flavour.

Last night my brother and I were cruisin' Chinatown and happened upon some squash at one of my favorite chinese grocers. I picked one up and if it goes well this weekend I'll serve it at Thanksgiving.

Friday, November 03, 2006

Goodbye Chef: Adieu

Well the chef is certainly dead. No yeast, no nothin. Just a gooey and now rock hard mass of flour. Next I shall try jump starting the culture with some grapes from a local corner grocery; the type of store that keeps their wares out on the sidewalk exposed to air. Apparently yeast enjoy spending time on grapes, so even if the grapes are from some other area chances are there will be some local boys hanging out on the grapes.

To use the grapes simply put them in the starting mixture of 1 part flour, 1 part purified water, close the container and maintain a temp around 65 °F to 85 °F. Check for yeast activity and start feeding around day 3.

Tuesday, October 31, 2006

Pound Cake: Elvis Style

We're baking a decadent desert tonight. It's in honour of my brothers immanent arrival scheduled for tomorrow evening. We'll try to save him some.

We've baked this pound cake once before. It was super rich, fluffy and tasted sweetly of eggs. That recipe called for 5 eggs, Elvis preferred his cake with 7; which is how we are preparing it this evening.

Pound cake got its beginning by consisting of a pound of eggs, a pound of butter, a pound of sugar and a pound of flour. This resulted in something quite dense and artery clogging. Though still apt to clog arteries the recipe we're following will produce something also quite light.

Ingredients:
1 cup unsalted butter
1 teaspoon salt

3 cups granulated sugar
1 teaspoon baking powder

5 large eggs (or 7 per Elvis)
2 teaspoons vanilla

3 cups all-purpose flour (Sift 3 times before measuring)
1 cup whipping cream


  • Butter and flour 2 9by5 inch loaf pans (or whatever else fits, just be sure to check it).
  • Whisk salt and baking powder into pre-sifted flour. Set aside.
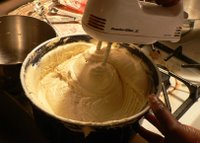
  • Cream butter and sugar together in an electric mixer until light, fluffy and almost white, 4 to 5 minutes, stopping mixer once or twice to scrape down sides.
  • Add eggs one at a time slowly, beating well after each addition.
  • Add one third of flour mixture into the mixer set at low speed.
  • Add half the whipping cream. Mix.
  • Continue alternating flour and cream, ending with flour.
  • Add vanilla. With rubber spatula scrape down sides and bottom until completely mixed. Pour into loaf pans, up to 2/3 full.
  • Start in a cold oven. Place pans on middle rack of oven. Turn oven to 325 degrees. Bake for 1 hour and 20 minutes or until toothpick comes out clean. (Note: It only took ours about an hour, so check early)

Saturday, October 28, 2006

Is the Chef Dead?

Well it has been 4 days. My chef dosn't seem to be doing well. No bubbles, no yeasty beer smells, no foam; none of the signs of yeast.

It seems to be separating; a stinky watery substance on top, a goopy floury substance on bottom. From what I've read the watery stuff is known as hooch, though if I don't have a yeast colony then it ought not be hooch. Hooch is said to be harmless; it can be poured off or mixed in. I wonder if the smell I'm smelling is that of rancid water and flour?

Tonight I poured off the hooch since the whole thing is rather watery. I mixed in some more flour and water. I'm going to leave the cover half off.

If you build it they will come.

Tuesday, October 24, 2006

The Chef: Naturally Leavened Bread

Well I've gone and done it; I've started what I hope to be a long line of naturally leavened bread, leavened by wild Brooklyn yeast. Perhaps I will pass on this line of yeast to my children and to my children's children? It's rumoured that in China there are old very lineages, hundreds and hundreds of years; I'd sure like to taste one of those dumplings!

There's no telling if this first attempt will be successful. It may just mold or not ferment at all. Anyhow the idea is that there is yeast floating all about and that stirring up some water and flour will provide a nice habitat for said yeast. Hopefully in about 3-4 days I'll have tell tale signs of yeast life and proliferation; bubbles.

Make sure to use filtered or spring water; chlorine may inhibit yeast growth and give your breads an off taste. There are plenty of choices of flour; stone ground this, organic that. I used what was in my cupboard, unbleached white all purpose flour. You can also use fancy methods of introducing yeasts, like grapes or raisins. I'm looking for wild Brooklyn yeast so I did not attempt this.

In turn one must feed the colony (also known as starter, the bitch (as in "feed the bitch") or the chef). This is done by adding equal parts of water and flour. I've read that it should be fed every day, ramping up feeding towards the end (when bread will be made). If everything goes according to plan feeding should start around day 4.

Wednesday, October 11, 2006

Thanks Giving Au Canada

This post was long in comming. We lost the internet for nearly a week and I've been pretty busy with life recently.

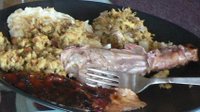
Anyhow for our Canadian Thanksgiving I made a Thompsons Turkey; a madening affair consisting of more thank 20 ingredients. (I'll restrain myself from posting the monsterous recipe here, do an internet search and you can find it) Our sides included lumpy (but delicious) buttermilk mashed potatoes, stuffing and spiced brown sugar carrots.

I'll not give any recipe since none existed. However I'll tell you what I put into the carrots and 'tados.

Spiced Brown Sugar Carrots:
  • Cut in a consisten size
  • Bake in small amount of boiling water or roasted in oven (if oven, add a little water and oil)
  • When cooked add brown sugar, nutmeg and cinnamon, as desired
Mashed Potatoes:
  • Season boiling water well with salt
  • Mash while still warm
  • Use lots of unsalted butter
  • For liquid: butter milk, heavy cream and/or evaporated milk
  • Also try sour cream, cottage/riccota cheese, a finely grated strong tasting cheese
  • Don't use too much buttermilk, a little goes a long way

Wednesday, October 04, 2006

Mother's Apple Sauce

We had a tone of apples in our fridge; some left over from our Vermont trip in August, some which we've bought since. Perhaps we should be more judicious in our apple buying.

This is my mother's recipe which she made all through my childhood. We would buy bushels of apples every season from a place called Smithy's on the east side of Saint John. Afterwards she would can the apple sauce, among other fruits; notably pears (they figured hugely in my mind). We would keep the apples on our back porch. The whole place would smell of apples; fond memories. The apples would be cold and crisp, delicious in my opinion; I definetly prefer my fruit cold.

This is not so much of a recipe as a procedure. There are no measurements only a basic method and suggestions (I've added a few of my own).

  1. Wash, peel, fourth and core apples.
  2. Add some water (or I'd suggest some fruity liquid like pear juice) to prevent burning.
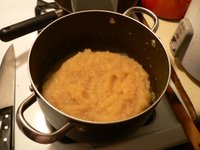
  3. Cook over medium low heat. As the apples soften break then up and stir.
  4. Season with sugar (or any sweetner of your choice; I'm curious about Chinese rock sugar). Note that you must do this by taste since apples will vary in sweetness every time.
  5. Season additionally with anything you fancy; perhaps lemon juice, ground cinnamon, ground nutmeg, ground cloves, raisins or nuts (or maybe wasabi, star anise, five spice powder, or ginger?)
  6. Consistency is a matter of preference or intended usage. Some like their apple sauce thick and chunky others like it smooth like the store bought.
  • To make it thinner add more liquid.
  • For chunky sauce don't break up the apples so much.
  • Thicker; cook it very low and reduce by evaporation.
  • Silky smooth, try running it through the blender.